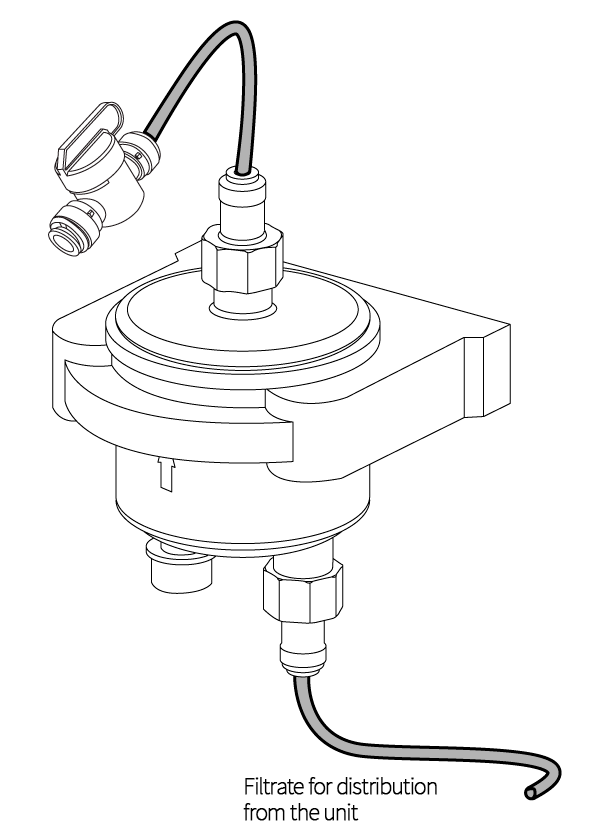
Connecting the filtrate distribution system
WD1 filtrate distribution system

It is possible to connect several distribution filtrate systems in parallel from one filtrate source.
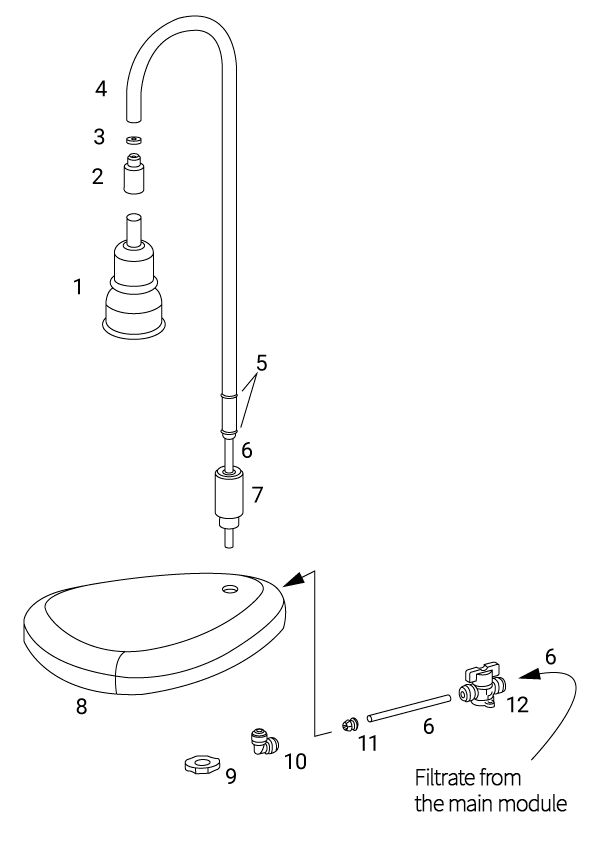
Distributor assembling.
Screw the tripod to the base using a nut.
Connect the elbow to the flexible tube in the tripod.
Connect a piece of tube with a valve to the elbow.
Connection.
Connect the HC4 “Filtrate” connections of the unit (or other connection to be used to withdraw filtrate under pressure) and the ball valve connector of the distribution system using a flexible tube.
Remove the compact sterilizing microfilter from packaging and screw it into the threaded adapter of the distribution system.
Filtrate withdrawal.
The filtrate can be withdrawn by opening the ball valve of the distribution system.
WD2 filtrate distribution system
Connection of this distribution system is possible only to the Aqualab S18 and Aqualab S18+ units.
Connection.
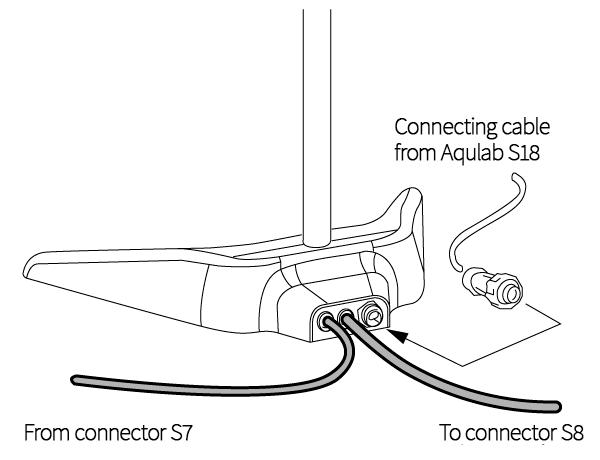
Connect the connectors S7 “Water type I to WD” and S8 “Water type I from WD” to the connectors on the connection panel of the distributor with flexible tubes
Connect with a cable the electrical connectors on the unit connection panel and on the distributor.
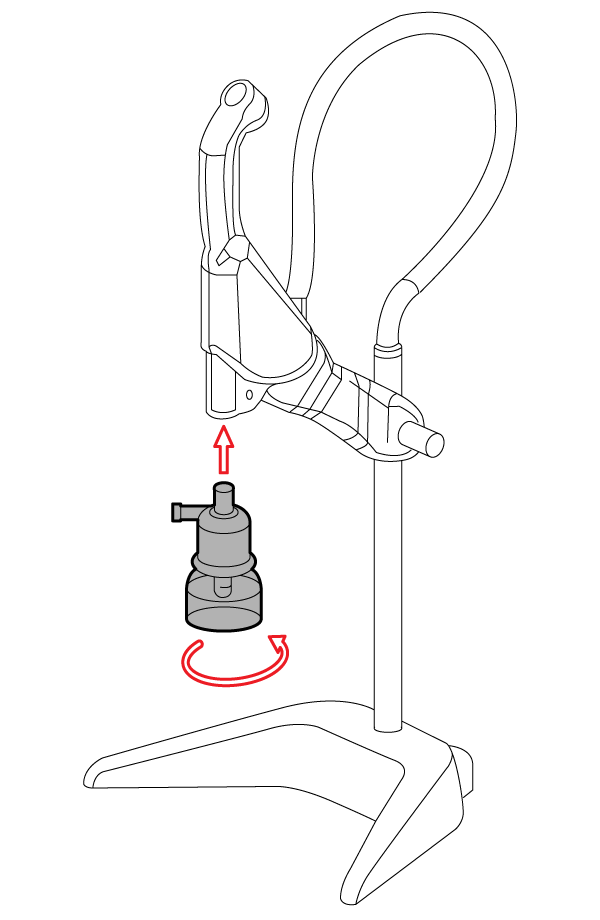
Remove the compact sterilizing microfilter from packaging and screw it into the threaded adapter of the distribution system. It is recommended to wrap fluoroplastic sealing material on the threads of the microfilter. Screw the microfilter on the thread adapter until the microfilter begins screwing on with tension.
Filtrate withdrawal.
The filtrate can be withdrawn by pressing the button on the handle of the distribution system. It works out if the electrical resistance of the filtrate is sufficient (green LED on the handle is on).
Sterilizing microfilter
A sterilizing microfilter which is not part of the distribution system can be mounted on the filtrate line from the unit. The microfilter can be mounted on the wall or on-close to the consumer.
Connection.
If necessary, mount the fixing clip supplied with the unit to the wall.
Remove the sterilizing microfilter from packaging and screw the threaded adapters to the 1/4″ flexible tube. It is recommended to wrap fluoroplastic sealing material on the threads of the microfilter
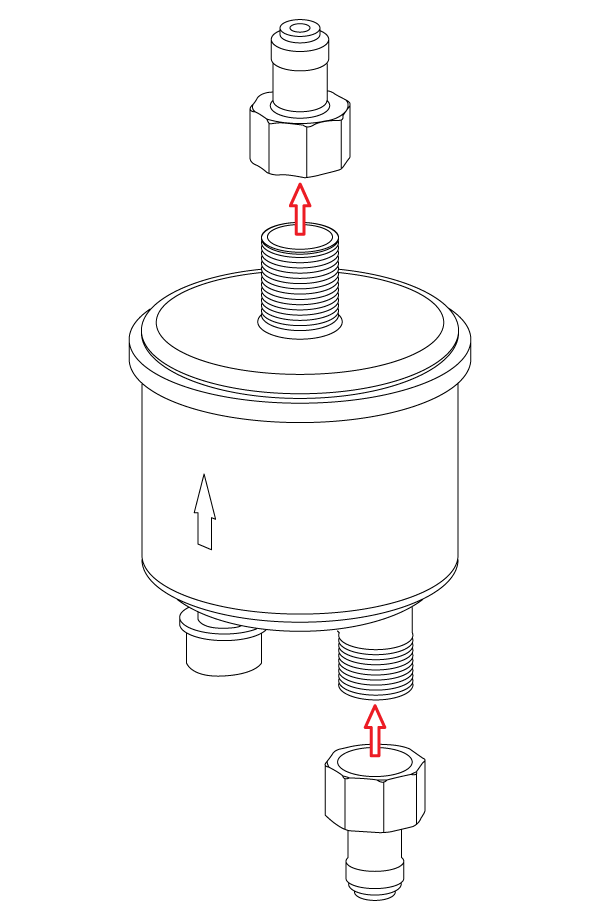
If required, fix the microfilter on the wall with the clip-fixer. Connect the HC4 “Filtrate” connector of the unit (or another connector from which the filtrate will be drawn under pressure) and to the connector of the microfilter adapter, using a flexible tube and keeping the direction of filtrate flow indicated by an arrow on the microfilter body.
Connect a flexible tube to the other end of the microfilter and direct it to the consumer (e.g. to the inlet connections of the analyzer). If manual filtrate taking off is necessary, install a ball valve in the line behind the microfilter.
Filtrate withdrawal.
The filtrate can be withdrawn by opening the ball valve.